Water Power

Run your car or bakkie on water with a HHO or HHOO generator.
![]()
![]()
![]()
![]()
![]()

You may e-mail me at
john@hydroxypower.co.za with questions, suggestions or if you
can help in any way.
|
Water Power
Run your car or bakkie on water with a HHO or HHOO generator.
|
|
How to build a basic hydrogen-on-demand wet cell. Keep it green with organic Septic Tank and Pit Latrine Treatments
|
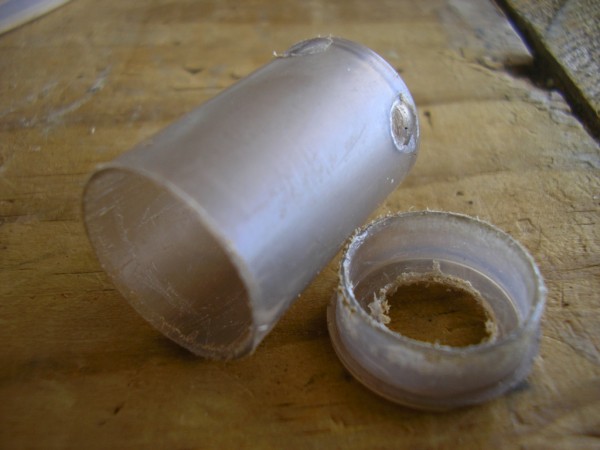
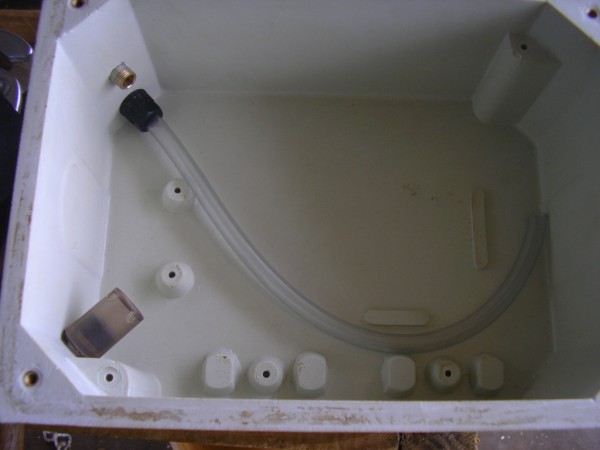
October 2009 My computer has been bombing out big-time recently to the extent that I was forced to get a new one. I could not just upgrade as my old pc was just too old. Then I made the big mistake ... it was called Windows Vista! I should rather have stayed with Windows XP service pack 2 (service pack 3 is as bad as having Vista!). I want to try Windows 7 ... ? Vista buggered up my FTP (and many other programs!) and that is why I have only now started updating this website. It has taken me a few weeks to try and recover, and re-install my website designs on my new hard drive and... and... ja boet! Nou Ja... I have run my new 316 plates for some time, but they seem to be wearing more quickly than my old 304 non-magnetic plates and also the production off them is about the same. I became suspicious as to the quality of the plates and when I applied a magnet I found that these "316" plates are slightly magnetic! So it seems that I have been ripped off... Ja boet... In any event, I will endeavour to obtain genuine 316 grade ss plates elsewhere. In the meanwhile I have built a new 9 plate cell based on Bryan martin's design and Eddie Batista's HHOO principle. Making the anti-splash guard for the HHOO outlet (it hasn't been cleaned up yet!).
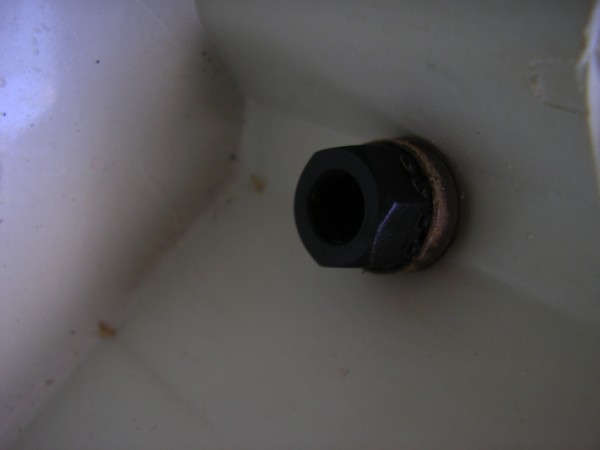
The brass HHOO outlet fitting. I previously showed the fibreglass box which will house the new cell.
The plastic fitting over the brass outlet fitting. The "cap" of the pill container is fitted onto the brass fitting and held in place by the plastic "nut".
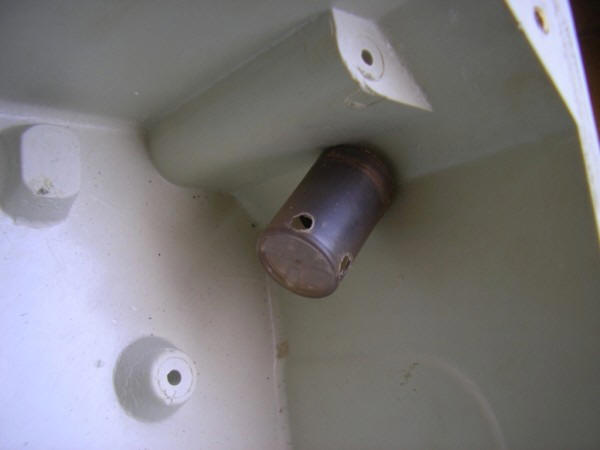
Anti-splash guard fitted.
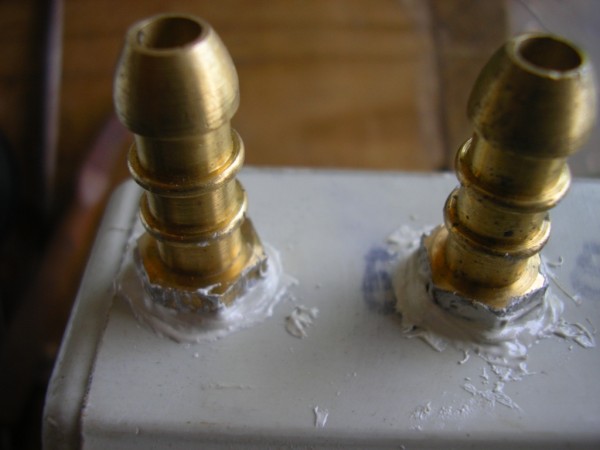
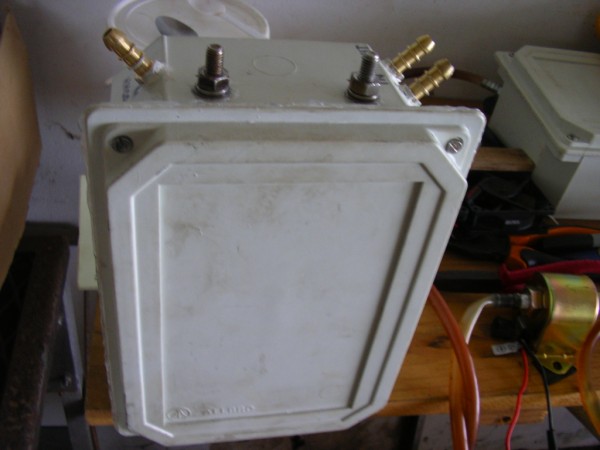
The brass fitting for the circulation of the electrolyte (for cooling). I sealed these fittings with Pratley's Putty.
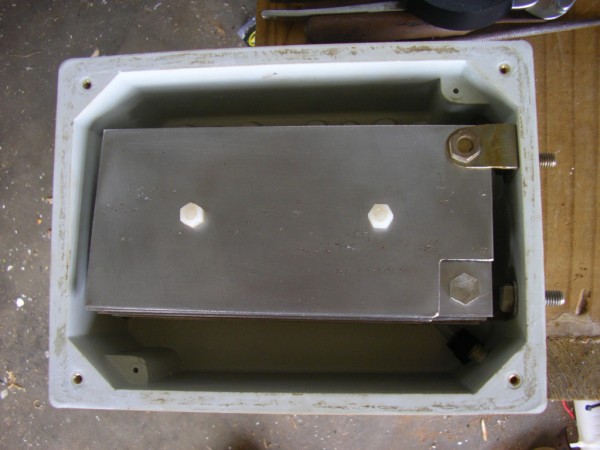
The "out" fitting has a plastic tube fitted so as to "suck" the electrolyte from out the bottom of the container. When I fitted the cell into the container I found that the anti-splash guard was too long. I removed it, cut it shorter and then it all fitted. I am using non-magnetic 304 ss plates for the contact plates which connect to the terminals (8mm bolts).
The completed cell with the lid tightly screwed on and sealed with silicone sealer.
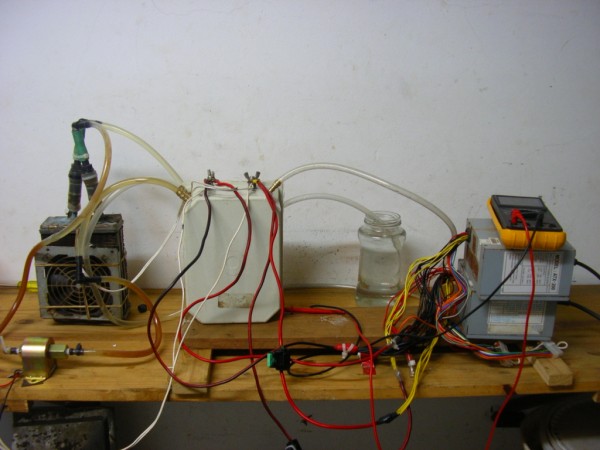
This is the setup on the bench which I ran for a goodly number of days to condition the plates. I changed the electrolyte (bicarb in ordinary tap water) about every 2 days. The amperage on these runs varied from 8A to 12A. The electrolyte would be very dirty at each change. I eventually replaced the copper core radiator with the aluminium one and the electrolyte did not discolour anywhere near as quickly. I use 2 old computer power supplies in parallel to handle the amp draw: the one power supply is good for 7A and the other 10A.
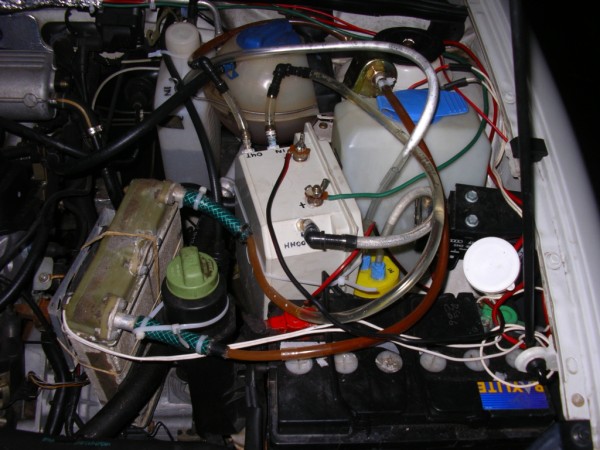
I had extreme difficulty trying to feed wires from the engine compartment through to the cab, so I had an auto electrician do it for me (well worth every cent!). I did all the soldering of the connections and the fitting of the pilot light, which would go out as soon as there was no more power to the electrolyser. The only connections which I had the auto electrician do was the connection of the on/off switch via the fuel pump relay. The on/off switch will only light up (and switch the relay) when the fuel pump is powered up. I am now using a Bosch relay as I am gatvol of the other types which keep on popping for no rhyme or reason.
The relay has 5 pins: the 2 x 87 are a common switched live. I used the first one to power the electrolyser and the second one to power the electrolyte pump and the radiator (for the cooling of the electrolyte) fan. The whole bang shoot crudely fitted in my car.
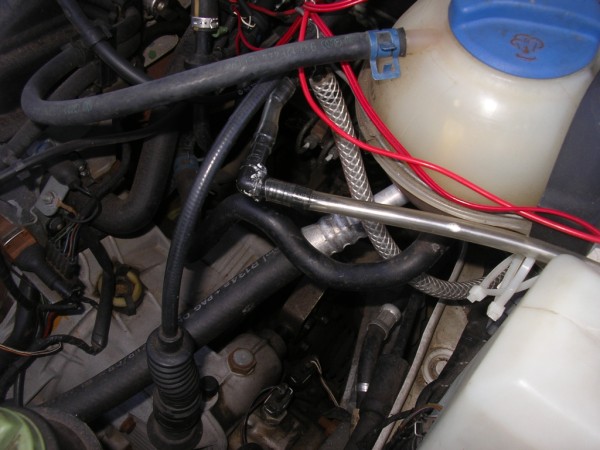
Just visible in the top-left corner: I cabled-tied silver foil around the gas tube and wiring to prevent it from being unduly heated-up from the exhaust manifold which is directly below these lines. I did some trial runs and found that the electrolyte was heating up too quickly at around 18 Amps. The position of the radiator is not ideal and it cannot get the proper cooling effect from the fan. Even when I added an additional (small) fan it made no improvement ... so location, location, location! I also think that a reservoir will be necessary so as to increase the volume of electrolyte in the system. I am waiting for the arrival of a DC ammeter which I will fit on the consol (the wiring is already in place thanks to the auto electrician). Hopefully my next update (probably tomorrow) will include pics of the new meter. When I have repositioned the fan (if I can) and added a reservoir then I can start running the electrolyser and measuring consumption. I can't wait! |
|
The information presented on this website is for you to look at, learn from, laugh at, or whatever. But if you try anything that you see here it is at your own risk. I will not take responsibility for your stupidity should something go wrong. |